How to create tables, rows and columns in Canva

Canva has become famous for providing free tools for producing graphic designs. However, the platform still provides the technology for creating other media, such as papers and presentations, which are expected to attract the attention of academic audiences. Next, learn how to insert tables, rows and columns into your Canva files.
Learn how to insert tables, rows and columns into documents
Necessary time: 5 minutes.
Resources can be entered both through the website and through an application on your mobile phone or tablet.
- find the website
Go to your browser’s search bar and search for “Canva login” in Google. Click on the first search result and access your account normally;

- Select the correct icon
Below the search bar will be several file icons. Look for the one that has the format of a document and click on it;

- Choose the orientation of the document
Select one of the orientation options, portrait or landscape, and click on it. In this tutorial we have chosen the classic format, which is vertical;

- add an item
To add new elements, such as texts or tables, click on the “+” button at the top left;

- Select the desired item
Scroll through the options until you find the “Table” button and click on it to add a table;

- Set the size of the table
Choose the amount of rows and columns you need to add. To do this, place your mouse arrow over the squares and click on the square that represents the correct amount you need to add;

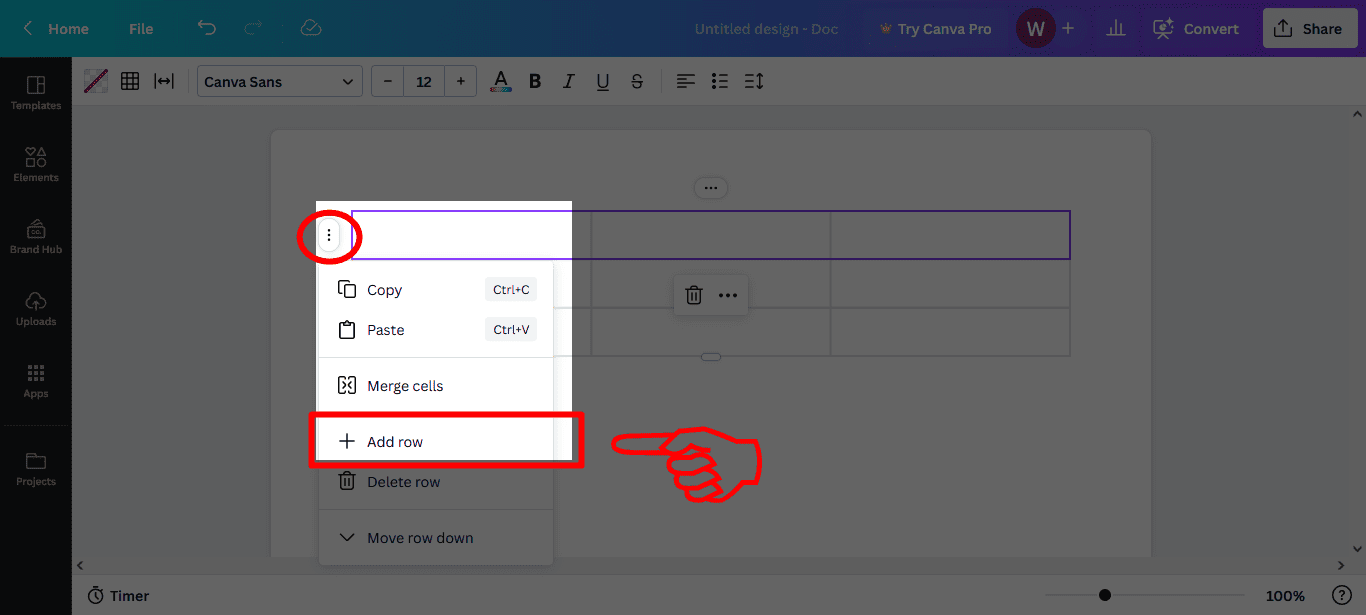
- add a row
On the left side and at the top of the column, you’ll find buttons labeled “three dots.” To add a row, you must first select one of the rectangles in the column, then click the button on the left and select the “Add Row” option;
- add a column
To add a column, you need to select one of the rectangles, click the button at the top and choose the “Add Column” option.

How to create a blank canvas and insert tables, rows and columns
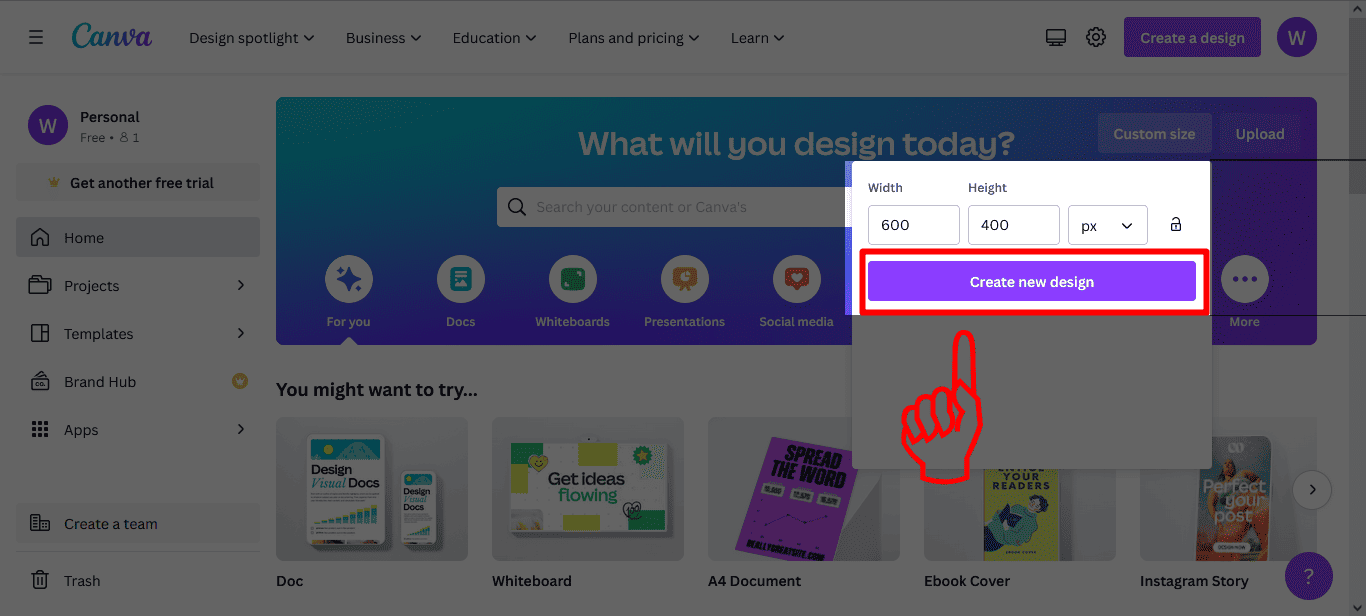
- On the home page, click the “Custom Size” button;

- Add the dimensions of your drawing (blank canvas), choose the desired size (such as centimeters or pixels), and confirm with the “Create new drawing” button;
- Once your design is open in the edit page, click on the “Elements” button to view the options of the elements that can be inserted into the design;

- Scroll down the page until you find the region showing tables. If you want a simple table, just click on the first model; however, if you need more examples, select the “See All” button to check out more options;

- Adjust the table to the desired size by clicking on the white icons;

- To insert rows or columns, just repeat the same step from the previous tutorial: click on a rectangle, select the button with three dots and add a row or column.

The post How to Create Tables, Rows and Columns in Canva first appeared on Olhar Digital.
Source: Olhar Digital
Leave a Reply